HDR Stands for High Dynamic Range.
HDR Photography is a fairly new type of photography which has become popular with the advances in
photoshop and digital post processing software. Simply put it is the process of combining several photos which range in exposure (brightness) into one surreal image. These images really stand out and its a wonderful way of tricking your brain into experiencing much more than a normal photograph.
When Should I use HDR Photography?
Since we now know that hdr stands for high dynamic range we need to clear up the difference between hdr as a term and hdr as a photographic technique. All high end cameras will produce a very high dynamic range file. Some will consider this hdr photography. This is true however photographers have skewed this term into a nickname for taking multiple exposures and combining them into one shot for a "SUPER HERO PHOTO," if i may. That means if you consider yourself a photographer and do not own a computer, well lets just say your no hdr photographer. So you ask what type of shot will look really cool when processed in hdr. Extreme differences in light. So a very dark foreground and a very bright background. Good examples are sunsets. Normal photography will give off a perfect background and sunset, leaving your foreground full of silhouettes, or your foreground properly lit full and full of detail and tones, and your background completely blown out. Also if you have any movement in your photos hdr is not a good idea. Remember you are shooting multiple exposures sometimes at very low shutter speeds. After processing you will notice Ghosting or blurs. These can be fixed in photoshop but sometimes it is a long painful process which you will never get paid for.
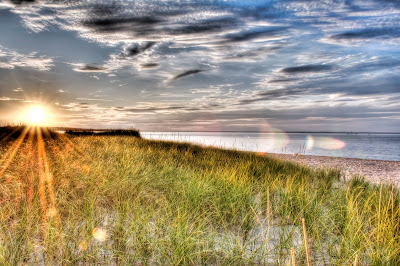
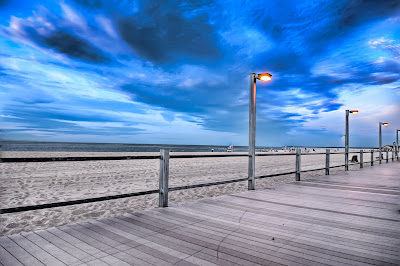
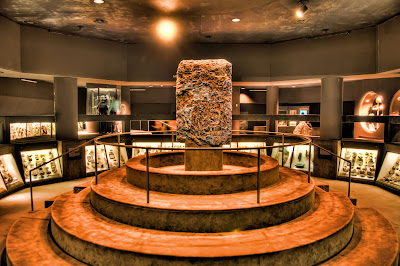
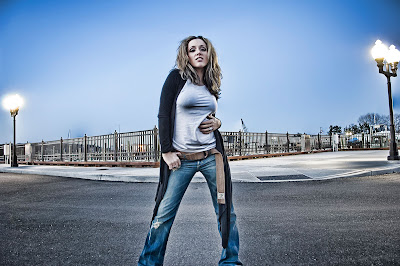
To illustrate what I have just talked about here are some
hdrs for ya. Most are 7 shot
hdrs processed in
photomatix, and filtered in
photoshop.


So now for the tutorial.
HDR is considered by many as the most difficult form of photography. Some photographers say its cheating and they will swear up and down its wrong. You will soon find out they are just computer illiterate or they are stuck in the 1800's still shooting film. ha.
I say grab your slr and hit the new wave of photography. Because if you cant beat em join em. As a photoshop professional writing to adobe blogs and tuts all over the net I feel more at home with my cs4 fired up than when I'm watching new episodes of fringe!
What do you need for the perfect hdr photograph?
Lets start with the basics. You do not need a 20 thousand dollar camera to shoot hdr. When people see my photos they always say "WOW, What kind of camera do you have." What they don't know is I have photo superpowers. All you really need is a camera with "bracketing."
Bracketing is an automatic feature on a camera that will take one exposure, and then take a few more darker and lighter. Depending on what you set your "BKT" to is up to you. I usually use 5 as my bracket but you can use 3, hell even 1 shot can be hdred.
So what equipment do I use?
So my camera for location shoots is a nikon d3. Hell of a camera and i love it.
I use a Bogen tripod with a fluid motion head. You can use any tripod but this sucker doubles as a weapon when trekking though downtown Manhattan.
A thumb trigger helps out a lot rather than holding down the shutter release button.
For all your post processing needs please stop here and use your pc as the doorstop it always wanted to be and buy a mac. You will love me for it. You will need some hdr software like photomatix. Which is what I use.
Now lets look for some extreme levels of light and start shooting!
Set up your camera in Aperture Priority mode. This is important because you don’t want the multiple photos to have that horrible lens-flex effect
Turn on Autobracketing. If you have 3 pics in the autobracket, set it up at -2, 0, +2. On my Nikon D3x, I usually take 5 pics at -2, -1, 0, 1, +2. I’d prefer just to take 3 pics at -2, 0, and +2, but this camera only steps by 1. I think you will find this +2 to -2 range satisfactory for 95% of situations. An exception, for example, would be shooting the interior of a house that is extremely dark and there are windows where the outside is extremely bright.
Other best practices:
- For 95% of situations, going from +2 to -2 is enough light range.
- Shoot in RAW, if you can. JPG is okay, but RAW gives your more flexibility later in the processing. RAW photos contain a lot more light information than a JPEG. Please note that when processing in Photomatix later, the RAWs are no better than JPEGs.
- Use a tripod, unless you have the steady arms of a late-model Terminator robot.
Next lets break it down with a little bit of photomatix pro.
Now it is time to fire up Photomatix and get silly.
Photomatix will take your 3+ or whatever shots and convert them into an HDR image. You can then tonemap the image and save it as a JPEG. I’ll take you through this process.
You can run Photomatix in a few ways:
- To generate an single HDR from some autobraketed shots (most common for beginners and the bulk of this tutorial)
- To do a huge batch of HDRs after you come back from a shoot
- To convert a single RAW photo into an HDR
Let’s go over the first one in detail. I’ll mention the others later, but they are not too hard to figure out after you understand how the first one works.
When Photomatix is loaded up, you just see a menu.
Choose the images you like then click OK. You will then see a second dialog. I have selected the most common choices that I make. In this case, I feared there might have been a tiny amount of camera shake even on the tripod, so I asked Photomatix to try to align.
Normally, I use a tripod and a wired shutter release, so I have no camera shake. If you are doing hand-held, then, of course, always choose “Align source images”. I get mixed results with the other choices. I have a better program for reducing noise and a better method in Photoshop for fixing “ghosting artifacts”. You can play with those options, if you wish, however. There are not many wrong choices you can make on this dialog, so don’t panic
Click OK again and now your computer will kick into high gear like a russian racehorse.
You will soon see a strange looking image on the screen. You are not done yet – not even close. That is an HDR image and you can’t really do anything with it until it is tonemapped. So, now click on “Tone Mapping” (note this is also available via the menu system)/ Now you will get a nice little dialog with all these fun gizmos and Willy Wonka-like controls.
Every picture is different. There is no “right way” to set these sliders. There is certainly a “wrong” way to do it, though. I am sure you have seen lots of crappy HDR images.
Once you have set everything up with the sliders, click Process and save the result. You’ll be bringing it into Photoshop next for final cleanup. This is where i use noiseware to get rid of that hdr noise. I use photoshop to clean up any motion issues.
And thats it folks. Hdr in 10 min. This is just the tip of the iceburg. I have been shooting hdr for 5 years and processed thousands of images before perfecting my skill. However this is a tequniqe anybody can do and i highly encourage you to take the time to learn it. Not only will it give you impact images superpowers but it will also teach you a lot about lighting and camera options.
Thanks for reading and feel free to use any of my shots for your own inspiration.
Mark Perez
Impact Images
Home Fasion Photography Specialists


